Monday, October 8, 2007
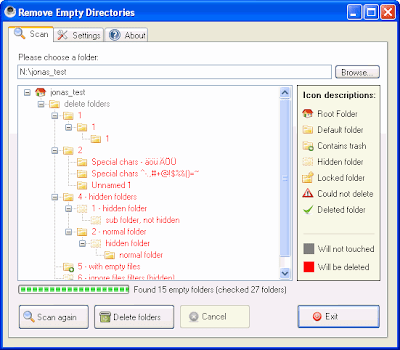
Scan & Delete Empty Directories on your System

Sunday, September 30, 2007
What you should know about the Desktop.ini file
A common use of the Desktop.ini file is to assign a custom icon or thumbnail image to a folder. You can also use Desktop.ini to create an infotip that displays information about the folder and controls some aspects of the folder's behavior, such as specifying localized names for the folder or items in the folder. Actually carries out the same job the thumbs.db file does.
Use the following procedure to customize a folder's style with Desktop.ini:
- Use PathMakeSystemFolder to make the folder a system folder. This sets the read-only bit on the folder to indicate that the special behavior reserved for Desktop.ini should be enabled. You can also make a folder a system folder from the command line by using attrib +s FolderName.
- Create a Desktop.ini file for the folder. You should mark it as hidden and system to ensure that it is hidden from normal users.
- Make sure the Desktop.ini file that you create is in the Unicode format. This is necessary to store the localized strings that can be displayed to users.
Creating a Desktop.ini File
The Desktop.ini file is a text file that allows you to specify how a file system folder is viewed. The [.ShellClassInfo] section, allows you to customize the folder's view by assigning values to several entries:
| Entry | Value |
| ConfirmFileOp | Set this entry to 0 to avoid a "You Are Deleting a System Folder" warning when deleting or moving the folder. |
| NoSharing | Not supported under Windows Vista or later. Set this entry to 1 to prevent the folder from being shared. |
| IconFile | If you want to specify a custom icon for the folder, set this entry to the icon's file name. The .ico file extension is preferred, but it is also possible to specify .bmp files, or .exe and .dll files that contain icons. If you use a relative path, the icon is available to people who view the folder over the network. You must also set the IconIndex entry. |
| IconIndex | Set this entry to specify the index for a custom icon. If the file assigned to IconFile only contains a single icon, set IconIndex to 0. |
| InfoTip | Set this entry to an informational text string. It is displayed as an infotip when the cursor hovers over the folder. If the user clicks the folder, the information text is displayed in the folder's information block, below the standard information. |
The following illustrations are of the Music folder with a custom Desktop.ini file. The folder now:
- Has a custom icon.
- Does not display a "You Are Deleting a System Folder" warning if the folder is moved or deleted.
- Cannot be shared.
- Displays informational text when the cursor hovers over the folder.
The folder options in the following illustrations are set to show hidden files so that Desktop.ini is visible. The folder looks like this:
When the cursor hovers over the folder, the infotip is displayed.
The custom icon replaces the folder icon everywhere the folder name appears.
The following desktop.ini file was used to customize the Music folder, as seen in the preceding illustrations.
[.ShellClassInfo]
ConfirmFileOp=0
NoSharing=1
IconFile=Folder.ico
IconIndex=0
InfoTip=Some sensible information.
Wednesday, September 26, 2007
Disabling Low Disk Notification
I have like 15GB of software Installation Files, which I split into 4GBs so I can easily burn them to DVDs if the need arises. These softwares are kept on a seperate partition which I keep full to the brim, I mean- I keep 10GB in a 10.5GB partition. I do not advice you to do the same because you will experience problems trying to defragment such drives.
I do not need to defrag those partitions because files they do not get fragmented, I do not delete large files from the partition and it so it is just intact.
Now when this is done, I get a low disk space warning notification which I don't like to see.
I found a way to disable the low disk warning notification.
Copy the text below into an empty note pad windows and store the document as with a reg extention i.e. if u decide to save the file as "disable low disk" save it as "disable low disk.reg"
Here's the code to copy:
[HKEY_CURRENT_USER\Software\Microsoft\Windows\CurrentVersion\Policies\Explorer]
"NoLowDiskSpaceChecks"=dword:00000001

Thanks to Raymond.cc and Hiren
Friday, September 21, 2007
Minimize any Window to System Tray with TrayIt

Sometimes when I’m working with my computer system, it is necessary to keep many windows open or minimized to the task bar. This makes my taskbar look disorganized and I don’t like to see it looking like that, so I found a new way to keep it tidy and neat.
Tray it is a small handy freeware that can minimize any window to the system tray keeping the task bar neat and tidy. TrayIt! allows you to save precious Taskbar space for minimized windows. For each application which applies TrayIt! it creates a small icon in the System Tray. (System Tray area is located near the Clock). When application's window is minimized this icon represents the application on the Taskbar instead of the regular "minimized rectangle". It is particularly useful for background tasks you typically keep running on your PC all day long like your favorite E-mail client, iTunes, e.t.c
TrayIt! runs on Windows 95/98/Me, NT/2000/XP and does not require any installation.
Simply create a new folder and place TrayIt!.exe and TrayIt!.dll there (Program Files recommended) When started, TrayIt! will show a dialog box with a short explanation on how to use it. You may choose to load TrayIt! on system startup by selecting "Option" and checking "Load TrayIt! on StartUp" box.
- You can temporarily put any window in the system tray by keeping down the CTRL
button when minimizing the window. (I tried this but didn’t work on XP but it did on 98).
- To always keep window in the system tray when minimized, click with the RIGHT mouse button on the corresponding icon created in the tray in the previous step and check "Place in System Tray" in the pop up menu.
- Clicking with the right mouse button on the minimize icon will bring TrayIt! context menu for this window. Just check "Place in System Tray" in the popup menu to make window always go to the tray.
- Please note that context menu will work only for the standard minimize icon and will not pop-up if the program use skins like MS Media player.

That’s it and you’re good to go, Don’t forget; You will have to configure TrayIt to start up automatically with Windows®. So you do not have to execute it every time Windows® start. You can open minimized windows by simply double clicking on the icon in the Tray, how easy.
Tray it is another amazing tool from Hiren (Thanks to Raymond)
Download TrayIt here
Any Questions, contribution - E-mail: nerve.it@gmail.comCiao
Saturday, September 1, 2007
Automating Installation of Windows 2000/XP
(Note: In this example I am using Windows 2000. You can easily substitute the same procedure for Windows XP Professional. So where you see a reference to anything Windows 2000, just Change it to Windows XP)
Resources You Will Need
Ø Windows 2000 Pro or XP Pro CD
Ø Latest Service Pack (SP 4 for Windows 2000 or SP1a for XP)
Ø Blank floppy disk
Ø Compression tool like WinZip or Winrar
Ø Hard drive space (a gigabyte is sufficient, but more is always better
)
Assumptions: (These are the drives I will reference in the article and what devices they are)
D:\ = Hard drive
E:\ = CD-rom Drive
Beginning Steps
To start off, create a directory and name it Win2k_CD. The name of the directory does not matter except to you. I find it easier to make the directory names descriptive and to work off the root of the drive. In this example I will be working from my D:\ drive. Next copy the i386 directory from the Windows CD to the Win2k_CD directory you created. I find it easier to work from a command prompt using xcopy. An example would be:
xcopy /E /I e:\i386 d:\win2k_cd\i386
Below is an image of the directories that I created.
Slipstreaming the Service Pack
Next, lets slipstream the Windows service pack into the installation. First you must download it from Microsoft, if you have not done so already. Please follow the below links to the service pack you need.
For Windows 2000 SP 4:
http://www.microsoft.com/Windows2000/downloads/servicepacks/sp4/download.asp
For Windows XP Pro SP1a:
http://www.microsoft.com/windowsxp/pro/downloads/servicepacks/sp1/network.asp
After downloading the service pack, extract it to the Win2k_SP4 directory. Again, this is my naming convention and you can use whatever you like to make it easier. So now you should see an i386 directory created within the Win2k_SP4 directory.
In order to slipstream the service pack into the Windows 2000 directory, open a command prompt. Browse to the D:\Win2k_SP4\i386\Update directory. While in the update directory type the following command (see image below for example):
update /s:d:\win2k_CD
When the process has finished a notification window will appear with the statement Integrated install has completed successfully.
Building the CD
Now that we have the service pack slipstreamed into the Windows i386 directory, we can begin to build the CD. You will need to download the following zip file (choose the one you need) and extract the contents into the D:\win2k_CD directory.
For Windows 2000, download this file: SP4_BootFiles.zip [2 kb]
There are 3 files in the SP4_BootFiles.zip:
- CDROM_IP.5 (tells the installation that it is a Windows 2000 Professional install)
- cdromsp4.tst (identifier file for service pack 4)
- w2kboot.bin (the boot sector for the cd)
For Windows XP, download this file: XP_BootFiles.zip [2 kb]
The XP_BootFiles.zip contains only one file.
Burning the CD
I will cover burning the CD using Ahead’s Nero Burning Rom (www.nero.com). You can also use other burning applications like Easy CD Creator, but you will have to apply the settings for the burn process yourself.
Begin by starting Nero and start a new compilation using the CD-ROM (Boot) option like in the image below.
Next, on the Boot tab, you will need to set the image file or boot sector. Select the w2kboot.bin file. Check Enable Expert Settings and set emulation to“No Emulation. Lastly, set the Number of Loaded Sectors to 4. See the image below for the settings.
On the Label tab, you can set your own settings here. I would set the volume label to something like W2KSP4_EN. All other fields are optional to set. Now you can click on New as shown below.
In order to burn the CD you have to copy everything within the Win2k_CD directory into the project. Remember to copy everything within the Win2k_CD directory and not that directory itself! See the image below.
Click on Burn and wait till it is done. You now have a bootable Windows 2000 CD with service pack 4 already integrated into it. Slipstreaming the service pack onto the CD only takes us so far. What we really want is to automate the installation of the operating system so we can pop in the CD and let it install all on its own. So next we will have to create a winnt.sif file that will provide the answers for the installation’s questions.
The Winnt.sif File and Automated Installation
Now that we have the CD ready, let's put together the automation. Microsoft has made vast improvements regarding automating processes including the installs of its OS’s. An article you will want to have is the Unattend.doc. It breaks down the different parts of the answer file and that is all the winnt.sif file is! All you need to know is the syntax, which is simple, and know which items you want to automate. I am going to cover the Windows 2000 answer file. XP is essentially the same, but has some other features that I will discuss in a later installment.
Creating an answer is easy. First we will need to use Setup Manager (setupmgr.exe) from the Deploy.cab file located on the Windows 2000 CD. On the Windows 2000 CD, there is a Support\Tools folder with the Deploy.cab in it. Extract the Deploy.cab file to a temp directory. There are several other items that were extracted, too, and will be covered in the later sections. Run Setupmgr.exe and walk through each window. The second to last window will prompt you to create a distribution folder. We are not doing that in this instance so select No, this answer file will be used to install from a CD. The final window determines the output location of the answer file. The default name is Unattend.txt.
After the file is saved, rename it from Unattend.txt to winnt.sif. You can then copy this file to a blank formatted diskette.
Let's Start Installing
Now that we have our answer file and CD, we can start the install. With the CD in the drive, start up the computer. The CD will prompt you to press any key to boot from CD… Once you hit a key, insert the floppy diskette into the drive. The installation will now check the floppy drive to see if there is an answer file for it to use and—Voila!
Most of the time the first automated install will not work as planned. There will be steps that are not automated that you will want to automate. Check out the Unattend.doc file that was extracted from the Deploy.cab. In there you will find all the different parameters for automating the installation. Next week I will dive into installing from a remote share and adding hot fixes to the installation as well.
Like I said on the Forum, the second section will be out soon, watch out. . .
Thursday, August 9, 2007
Extend Software Trial Period!
How to extend or reset the trial period of shareware, trial-ware, demo-ware or trial software?
Method 1
Reinstall the program. This is the easiest method, but highly likely that it won’t work mostly on current modern software, as the expiry check algorithm getting sophisticated by keeping the expiry information on started using date and days allowed for try use plus days left in the trial in the registry or in a randomly named file.
Method 2
Adjusting the clock (date and time) of your computer system before starting installation of trial software to future data, or adjusting the clock to past date after expired trial period. Again, this method most likely won’t work.
Method 3
Use a application installation monitoring software or uninstaller software such as Norton Cleansweep, Your Uninstaller! 2006 and Advanced Uninstaller PRO 2006 to keep track and monitor every changes to the system during installation, and then uninstall and revert the shareware completely to remove all traces of trial expiry data.
Method 4
Backup the registry before installation of software, and restore the registry after trial period passed. Only works on those shareware that store protection information in registry, and you will lose some important registry changes by Windows or other applications. Alternatively, use Regmon to monitor registry activity in real-time to identify possible candidates for trial expiry reg keys, and then delete those keys.
Method 5
Reinstall windows, and you can be sure that you can use all trial demo shareware again, as all dummy registry entries and dummy files that store trial information are wiped off.
Method 6
Find a crack, with the help of cracks search engine such as Astalavista. But this is not extending the trial period of software.
Method 7
Search with various search engines such as Google and Yahoo! for application-specific known workarounds.
Method 8
If you use any of the following software, then Trial-Reset can helps you to extend the trial period of the software. Trial-Reset is an registry cleaning tool (it claims it’s not a crack) that removes the keys generated by commercial and freeware protector of trial period, and hence makes the software as if just freshly installed. It actually automates the process of cleaning up the registry key related to trial expiry mentioned above. The software and its protected that Trial-Reset (version 3.0 RC3) supports and able to strips are as below.
ACProtectActiveMarkArmadilloASProtectDBPEEncryptPEEnigmaExeCryptorExeShieldICE LicenseNoCopyObsidiumOneWayOrienPCGuardProtectionPlusProtectSharewareSafeSerialSDProtectorSheriffSGLicenseShareGuardSoftLocxSoftSentrySoftWrapSTProtectorSVKPThinstallVBOLockVBoxVisualProtectXheo LicensingXProtectorZipWorx
To use Trial-Reset, just select which software protector that you want to scan for existance on the right hand side of the window. If the registry of the protector is found, make sure you you review the key to ensure that it’s the correct key that stores trial information. Then you can opt to backup the key, remove the key, add the key to protect list and other options.
Trial-Reset 3.0 RC3 can be downloaded here (Trial-Reset30RC2.rar). Future update can be found here.
Saturday, July 28, 2007
Removing the Coolpics Virus..
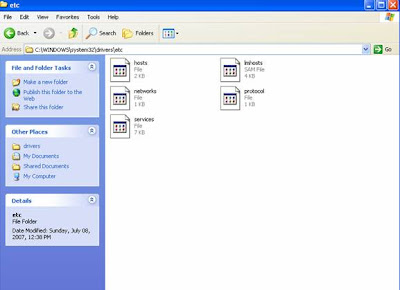
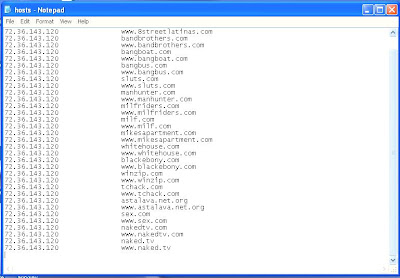
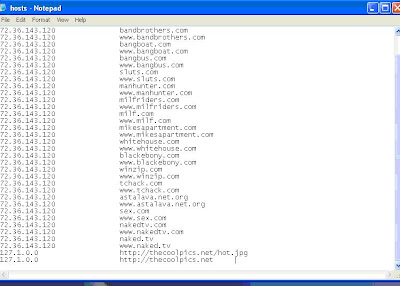
Remember to remove the "read only" attribute when you want to edit & re-apply after editing.
Welcum'
Please drop a line or two ;D

